Joe Techdiver pushes the button on his automatic garage door opener. The door slowly rises, revealing a cadre of friends eagerly awaiting gas fills for the day’s diving activities. Joe has built his own mixing station in his garage using equipment similar to that he examined in the local dive shop. Joe is an experienced diver and his buddies trust him to give them what they want-nitrox and trimix for deep dives. What Joe and his buddies may or may not know is that this practice can be fatal unless they learn and rigorously follow strict safety rules.
For the buddies it means they get gas fills at reduced prices, If indeed they pay at all. Plus, they don’t necessarily need the proper training, certification, and experience to use the gas they are mixing. If Joe thinks they can “handle it’’ then he will probably give it to them. For Joe, it means significantly reduced prices on mixed gas fills. Plus, he becomes very popular on Saturday mornings. The problem is that if something goes wrong, divers can die and Joe may lose his garage as well as the rest of his house in an expensive liability lawsuit. Make no mistake about it, mixing gas at home in your garage is dangerous for two reasons. The first is the risk of fire and explosion from high pressure oxygen. The second is incorrectly blended gas, which may lead to breathing a mixture at an inappropriate depth for its contents.
Gas mixing is better left to those who have the right equipment, the necessary training, and the experience to blend and analyze gas correctly. The technical dive shops in your area are the best place to buy gas-without exception. Nevertheless, many divers do mix gas at home. From the discussions Advanced Diver Magazine has had with some of these homebrewers, there is some misinformation out there regarding gas blending. We wrote this article to increase knowledge about gas mixing and promote safer blending practices among homebrewer divers.
The practice of homebrew began with the early technical divers who wanted to explore beyond the limits of nitrogen narcosis and oxygen toxicity. They discovered that custom blended fills using combinations of oxygen, nitrogen and helium provided distinct physiological advantages at certain depths. At that time, it was not possible to buy mixed gas fills in dive shops, so there was no alternative except to devise ways to brew your own mix at home. These homebrewers typically used a process that is now called partial pressure filling.
Partial Pressure Filling
Partial pressure filling usually begins with a completely drained, or empty, scuba cylinder. The scuba cylinder is partially filled with one or more gases by connecting it to larger supply cylinders via a fill-whip and opening the valves of both cylinders. The gas flows from the cylinder with the greatest pressure, the supply cylinder, to the cylinder being filled, the scuba cylinder. The scuba cylinder is then topped off with air using a compressor to complete the fill. This “topping off” with air is typically done at the local scuba shop, although some homebrewers have acquired their own air compressor as well. The exact amount of gas to use at each step in the fill process is calculated in advance using the principals of Henry’s law of partial pressures.
Mixing gas in your garage (homebrew) is discouraged by virtually all the training agencies and equipment manufacturers for two reasons:
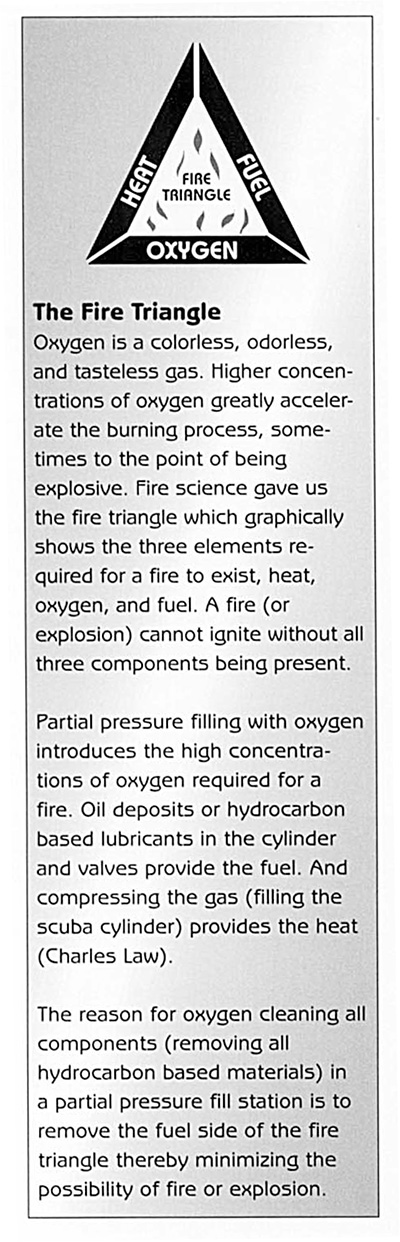
• Anytime high pressure oxygen is used in a mixing process, there is the possibility for explosion and fire (see fire triangle sidebar). Strict safety standards for minimizing this possibility have been set by many organizations, including TDI, IANTD, Luxfer, Catalina, and several government organizations, among others.
• Correct mixing and analyzing of the completed gas mixture is essential since breathing a constituent gas at a physiologically inappropriate partial pressure can cause hypoxia, oxygen toxicity, blackouts, convulsions and other physiological unpleasantness. To ensure accurate gas blending, relevant organizations established strict safety standards for mixing and analyzing procedures.
There are four main components to a partial pressure fill station: the supply cylinder, the fill whip, the scuba cylinder, and the oxygen analyzer. Supply cylinders are typically large, 300 cu. ft. cylinders that stand about 4-1/2 feet tall. They are typically constructed of steel and are pressurized to around 2250 psi. The fill whips are usually 3-5 feet long with high pressure connectors at each end plus an inline valve and pressure gauge. The scuba cylinders vary widely in size and service pressure ratings.
Supply Cylinders
Although some divers are experimenting with other gases, most homebrewers buy only oxygen and helium supply cylinders for the purpose of mixing nitrox, heliair, and trimix. Homebrewers should be aware, however, that the exact makeup of these supply gases varies depending upon the supplier and grade that is purchased. Helium supply cylinders may contain small amounts of oxygen and nitrogen if a vacuum wasn’t applied to the cylinder prior to filling. Likewise, oxygen supply cylinders may contain small amounts of nitrogen. Suppliers can usually tell you what percentage of trace elements their gas contains.
Helium and oxygen supply cylinders can be rented or purchased from local welding and medical supply facilities. A medical prescription may be required to purchase medical grade oxygen depending on state laws. Most suppliers offer three grades of oxygen: industrial, aviation, and medical. The difference between these grades is only in the procedures used for filling.
Medical and aviation grade oxygen cylinders are first completely drained, then a vacuum is applied to the cylinder to remove all gases. The cylinder is then filled to its working pressure with oxygen. One cylinder from each lot of medical and aviation grade cylinders is analyzed for purity. The rest of the lot is assumed to be the same as the analyzed cylinder since they are filled simultaneously from the same source. The only difference between medical and aviation grade oxygen seems to be the price. For those who can’t obtain a prescription for medical grade oxygen, the exact same cylinder can be purchased as aviation grade for roughly twice the price.
Industrial grade cylinders do not have a vacuum applied prior to filling nor are they analyzed by the supplier. At best, industrial grade cylinders have a trace amount of nitrogen from the air that was in the cylinder prior to filling. At worse, there may be small amounts of other gases, for example, acetylene from an improperly configured welding system. Acetylene welding systems operate by blending oxygen and acetylene in a nozzle that is then ignited with a spark. The hoses leading to the nozzle have check valves (special one-way valves) that prevent one gas from backflowing into the other cylinder. The reality is that when these valves fail in the field welders simply bypass the check valve by removing it from the hose. Under these circumstances there is a small chance that acetylene could backflow into the oxygen cylinder. Since industrial grade cylinders are not evacuated prior to filling there may be trace elements of acetylene in the 02 supply cylinder. Granted, this possibility is remote, but possible nevertheless. We were not able to locate any information regarding what partial pressure of acetylene is considered harmful to humans.
Transfer Whip
A transfer, or fill whip is required to transfer oxygen or helium from the supply cylinder to the scuba cylinder. All components of the whip must be designed for high pressure seNice and be compatible with high pressure oxygen. All components must be properly cleaned and totally free of hydrocarbons (petroleum based materials like grease, oil, and rubber}, including the lubricants and o-rings.
A fill whip can be either be purchased whole and ready for use, or the components can be purchased separately, properly prepared, and assembled by the homebrewer. All components must be rated for use at the maximum pressure they will be used at. Fill whip components are typically constructed of copper or brass. The following is a list of whip components:
Connectors
An industry standard CGA-540 style connector is required for connection to an oxygen supply cylinder, while a CGA-580 style connector is required for connection to helium supply cylinders. A CGA- 540 to CGA-580 adaptor can also be purchased to convert an oxygen whip to fit a helium cylinder.
Line Filler Valve
A line filler valve is used to control the rate of filling. When filling oxygen the rate should not exceed 300 psi per minute to prevent excessive heat build up in the scuba cylinder. A good technique is to gently open the fill valve until you can barely hear the gas filling. Filling the scuba cylinder in cool water also helps to dissipate heat.
High Pressure Hose
High pressure teflon oxygen hoses should be used to fill oxygen. A 3-5 foot length is sufficient. These hoses are constructed of a teflon inner hose with an outer reinforced jacket of stainless steel braid.
Pressure Gauge
Pressure gauges come in many sizes, styles, and pressure ratings. Analog gauges are more difficult to read than digital gauges, but digital gauges are more expensive. Gauges with less than 2% error over the full range of measurement are best. Some homebrewers use a digital, air integrated dive computer as their pressure gauge. These units work well but all components must be free of hydrocarbons before use with oxygen.
Scuba Yoke
Scuba yoke and din fittings are standard per the scuba industry. Like all other whip components they must be free of hydrocarbons and rated for high pressure use.
Check Valve (optional)
A check Valve can optionally be used to prevent backflow of gas into the supply cylinders in the event the scuba cylinder contains more pressure than the supply cylinder.
Quick Disconnects (optional)
Quick Disconnects are quick release fittings that enable the whip to be quickly connected and disconnected.
Flow Restrictor (optional)
Flow Restrictors prevent the fill rate from exceeding a set value thereby preventing excessive heat buildup due to gas transfer.
Scuba Cylinders
Scuba Cylinders must also be free of hydrocarbons if high pressure oxygen is to be introduced into the cylinder. New scuba cylinders do not come from the manufacturer's oxygen clean (free of hydrocarbons). They must be cleaned of petroleum-based grease and oil deposits, and the rubber a-rings must be removed and replaced with Viton O-rings. Care should be exercised to not top off oxygen clean scuba cylinders at air fill stations (compressors) that have not also been oxygen cleaned. A non-oxygen cleaned compressor can introduce small amounts of oil into the scuba cylinder, contaminating it and requiring oxygen cleaning again.
Oxygen Cleaning
All components of a partial pressure fill station must be cleaned of hydrocarbons to minimize the risk of fire and explosion. The basic process of 02 cleaning Is fairly simple (see side-bar). The equipment Is first disassembled. All petroleum based components are removed and discarded. The remaining components are cleaned with a mild degreaser. Non-petroleum based lubricants are added. Viton O-rings are inserted and the components are reassembled. Two chemicals are especially good for removing oil based contaminates from scuba tanks, valves, and fill whip components:
1) SD-113, A water soluble, biodegradable, degreaser that is safe for all metals; and
2) Tribasic Sodium Phosphate (TSP), A mild degreaser that comes in a powder form and requires mixing.
All rubber O-rings used in partial pressure filling of oxygen must be removed and replaced with Viton Orings. Viton O-rings can be easily purchased by taking all of the Orings that were removed from the valves and fittings to a local supply company. The supply company can match virtually any rubber O-ring with a Viton equivalent.
Only non-petroleum based grease can be used on threads, fittings and Viton O-rings. The following products are recommended: Halocarbon Grease; Fluorolube; Krytox; and Chrisolube.
The Mixing Process
The mixing process is relatively straightforward. The first thing to do is open the cylinder valve and drain the cylinder completely. Remember that the cylinder won’t really be empty, though. It will contain 14. 7 psi of air or some combination of air and the last gas the cylinder was filled with. In most cases, this small amount of gas will have a negligible effect on the final gas mixture.
When partial pressure mixing any combination of helium, oxygen and air, the helium should be added first, followed by oxygen, and then topped off with air from an oil free compressor. Oil free air is especially important to prevent contamination of oxygen cleaned components.
After adding each gas to the scuba cylinder, the scuba cylinder should be left to cool to room temperature before continuing with the mixing. This will give more accurate pressure readings for calculating the percentages of each constituent gas. When topping off with air, the most accurate mixing occurs by filling to the planned pressure, letting the scuba cylinder fully cool to room temperature, then measuring the cool pressure with a gauge and slowly topping off again to the planned pressure. If all phases of the fill are begun at a constant room temperature, very accurate partial pressure blending is possible.
Gas Analysis
The most important phase of any gas mixing process is the analysis. Without analysis, there is no way to accurately determine appropriate breathing depths for each cylinder, nor can you determine proper decompression profiles, since the exact ratio of each constituent gas is not known. Especially unsettling is the fact that many homebrewers don’t analyze their gas. They, instead, rely on the partial pressures used in blending the gas to calculate the ratios. This is a dangerous practice. Divers have died because they breathed gas from a cylinder that was blended incorrectly and not analyzed. Temperature variances during filling can play a significant role in altering the final mixture. Divers who don’t analyze their gas are playing Russian Roulette with their cylinders in a very real sense.
All that’s required to analyze gas is a simple oxygen analyzer. These devices can be purchased for as little as $250 U.S. A constant flow regulator with scuba yoke, similar to those used on medical oxygen cylinders, is also required. These regulators can be purchased for as little as $50 U.S. The analyzer you select should have no more than 1 % error over the full range of measurement. The small digital analyzers seem to be best suited for diver use.
The procedure for analyzing gas is simple. First the analyzer is calibrated, then the gas is analyzed. When mixing nitrox or heliair, only one analysis is required per cylinder. When mixing trimix two separate analyses are required per cylinder at different stages of the blending process.
Calibration
Analyzer calibration is simple. After assembling the analyzer, connect it to a cylinder containing a known percentage of oxygen-like air (20.9% 02), or pure oxygen (99.9% 02-few sources of oxygen actually contain 100% 02, ask your supplier for the exact percentage to use). Turn the analyzer on, give it a few minutes to stabilize, then adjust the display via the calibration knob to read the correct value (i.e., 20.9 or 99.9). Disconnect the analyzer from the calibration source, then reconnect it to the same cylinder and check the calibration. It should read within .2% of the initial reading to be considered calibrated. When mixing gas with a desired final percentage of oxygen greater than 60% it is best to calibrate using pure oxygen to minimize errors in the reading. When mixing gas with a desired final percentage less than 60% 02 air is best for calibration.
Analyzer elements last from 9 to 24 months. When they are reaching the end of their useful life the analyzer will take longer to stabilize and maintaining a calibration may become more difficult. Analyzer elements cost around $ 75 U.S. Plan on replacing them regularly.
Nitrox Analysis
After filling your cylinder with the correct percentages of oxygen and air, connect the analyzer to the cylinder, open the cylinder valve, and adjust the flow to 2-4 cu. ft. per minute. Wait 2-3 minutes for the reading to stabilize, then check the display. If there is too much oxygen in your gas, you can slowly add small amounts of air to bring it down to the desired reading. Be careful to not over pressurize the cylinder though. If there is too little oxygen in your final mix, you will either have to use it the way it is, dump it and start over, or add small amounts of oxygen using an oil free Haskel pump or similar device.
Heliair Analysis
Heliair analysis is the same as that for nitrox. If the analyzed gas contains too little oxygen, you can slowly add small amounts of air to bring the 02 content up. Be careful to not over-pressurize the cylinder though. If there is too much oxygen, you will either have to use it the way it is, dump it and start over, or add small amounts of helium using a ·Haskel pump or similar device.
Trimix Analysis
Trimix is analyzed twice. Once after, the helium and oxygen have been added to ensure the correct ratio of these two gasses. Then analyzed a second time after the air has been added to ensure accurate mixtures. Beginning each stage of trimix blending with the cylinders at a constant temperature (room temperature) is essential to minimize blending errors due to temperature variance. Small adjustments at each step in filling can correct for slight errors in the mix, as with nitrox and heliair analysis.
Gas Diffusion
In researching for this article, we came across passionate differences of opinion regarding diffusion. Diffusion is the process whereby two constituent gasses intermix throughout the cylinder. Some persons claim that you have to roll a cylinder to mix the gasses after filling or you have to wait 24 hours before analyzing to give the gasses time to mix. However, virtually everyone we spoke to in the gas blending industry says this is hogwash. Representatives say that by the time you finish filling your cylinder and connect the analyzer, the gasses will be 99.9% diffused.
Summary
If you insist on blending your own gas, then safety measures, like proper cleaning of the equipment, mixing techniques, and gas analysis, are essential. Technical diving is not about who can step farther out over the edge. Rather, it’s about fun, exploration, and excitement. If you are not prepared to invest the time and money (and space in your garage) required to develop a homebrew fill station, then we’ll see you at the tech dive shop, where we can shoot the breeze while we wait for our fills.